
How to create merch designs for independent artists
TL;DR:
- Successful merch starts with clear intention and understanding your audience’s preferences.
- Simple, purposeful designs and thorough testing increase the likelihood of sales.
- Partnering with print-on-demand services minimizes risk and streamlines production for creators.
Imagine spending weeks saving up, ordering a hundred T-shirts with your logo slapped on the front, and watching them sit in boxes because nobody wants them. It happens more often than most artists admit. Generic merch fails not because the artist lacks talent, but because the design process was rushed or disconnected from what fans actually care about. The right merchandise can significantly boost your profile and income, but only when it starts with intention. This guide walks you through every stage, from clarifying your vision to launching your first run, so your merch earns its place in the world.
Table of Contents
- Laying the groundwork: defining your merch vision
- Tools and resources for creating standout merch designs
- Design principles for effective merch
- From design to production: testing and launching your merch
- What most first-time merch creators overlook
- Bring your merch vision to life with The Inner Sanctum Group
- Frequently asked questions
Key Takeaways
| Point | Details |
|---|---|
| Clear vision is crucial | Defining your goals and audience before designing merch leads to better sales and brand alignment. |
| Choose the right tools | Digital design platforms and traditional methods each have pros and cons, so pick what suits your skill and budget. |
| Simple designs sell | Merchandise that is easy to recognise and fits your brand tends to attract more buyers. |
| Test before you scale | Using prototypes and collecting feedback on designs helps avoid costly mistakes before full production. |
| Involve your audience | Co-creating with your fans results in more engaging, sell-out merchandise. |
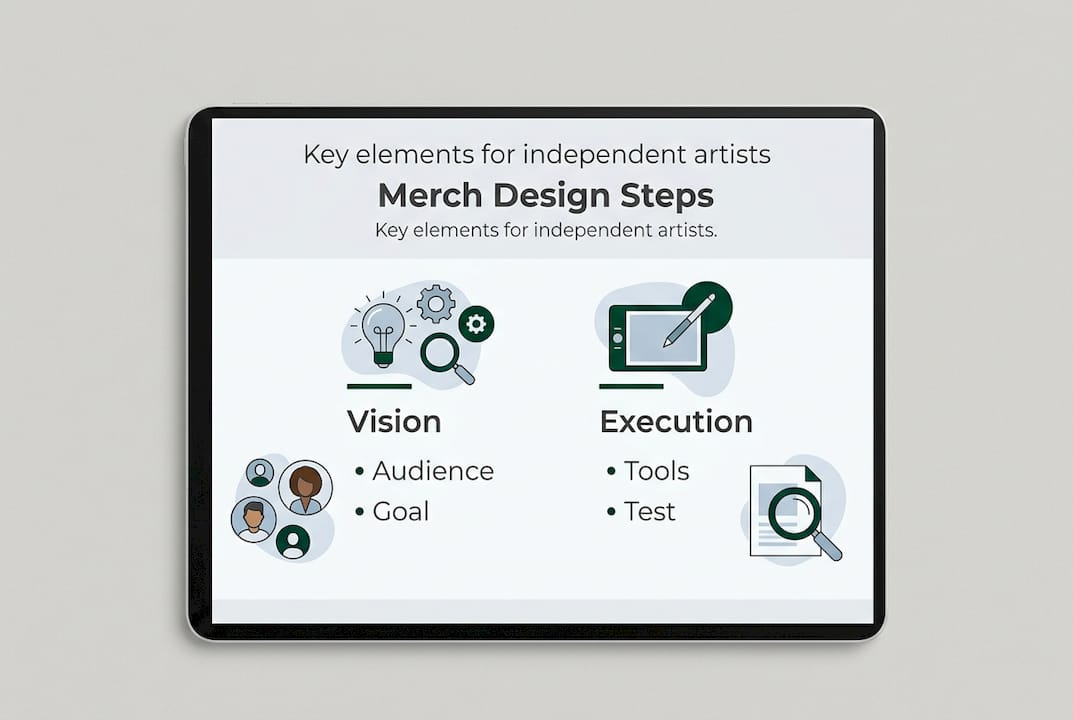
Laying the groundwork: defining your merch vision
Before you open a single design tool, you need to know what you want your merch to do. That sounds obvious, but most first-time creators skip this step entirely and pay for it later. Are you trying to generate income, build brand awareness, or strengthen a sense of community around your work? Each goal shapes different decisions.
Knowing your audience is just as important as knowing your goal. A jazz musician’s fanbase has different tastes to a punk band’s following. A visual artist selling at markets attracts different buyers to a streetwear brand targeting teenagers online. The more specific you are about who you are designing for, the more likely your merch is to resonate.
Translating your artistic identity into visuals and messages is the creative heart of this stage. Think about the colours, symbols, and phrases that already define your work. What do fans quote back to you? What imagery appears across your album covers, social posts, or live shows? These are your raw materials.
Here are some useful starting points for defining your merch vision:
- Write down three words that describe your brand or sound
- List five things your audience cares about beyond your music or art
- Collect visual references from artists or brands you admire
- Identify one message you want every piece of merch to communicate
- Set a clear goal for your first run: profit, awareness, or both
Brainstorming works best when you give it structure. Set a timer for twenty minutes and sketch or write freely without judging your ideas. Then filter ruthlessly. The strongest concepts are usually the simplest ones.
Pro Tip: Focus on what your audience values most, not what you personally love. Your fans wear your merch in public, so it needs to speak to their identity as much as yours. If you are just launching merch for the first time, ask a handful of loyal supporters what they would actually wear before committing to anything.
Tools and resources for creating standout merch designs
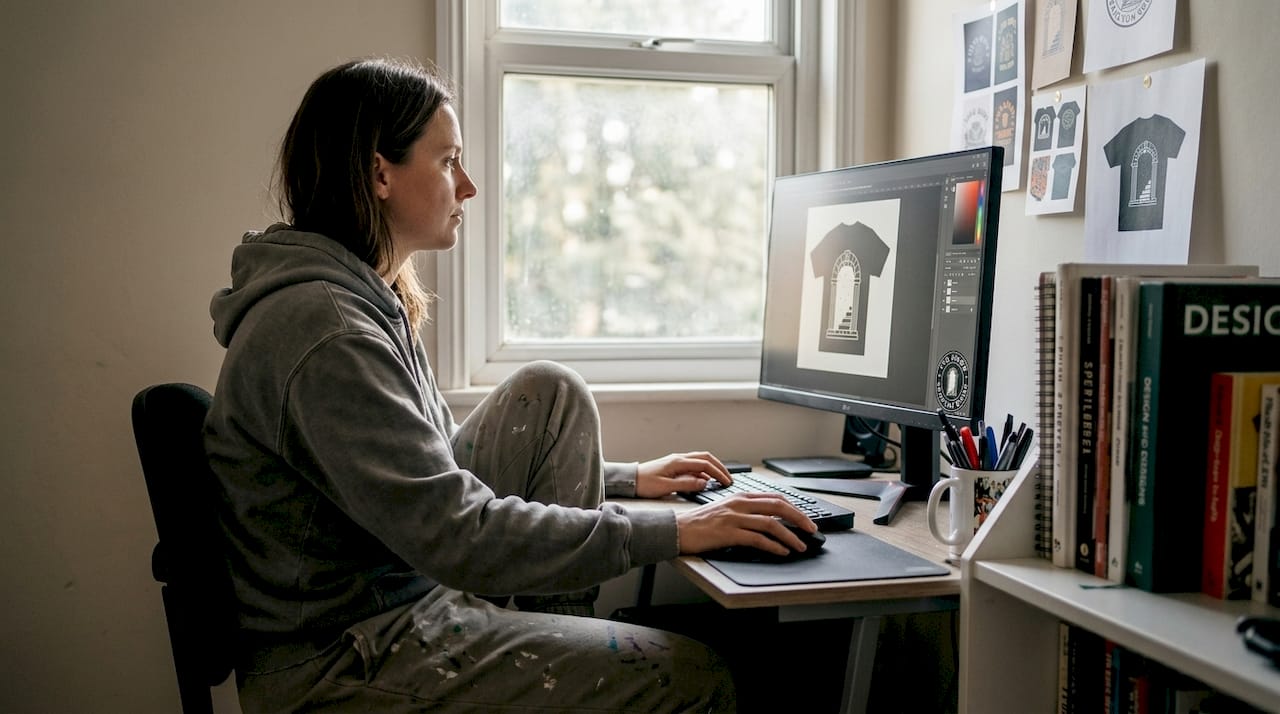
With a clear vision in hand, the next challenge is choosing the right tools to bring it to life. The good news is that you do not need a design degree or expensive software to create professional-looking merch.
Digital tools offer scalable, professional-quality results for creators at every skill level. The key is matching the tool to your current abilities and budget. Here is a quick comparison of the most popular options:
| Tool | Best for | Price | Print-ready exports |
|---|---|---|---|
| Canva | Beginners, quick layouts | Free / Pro | Yes (PNG, PDF) |
| Adobe Illustrator | Advanced vector work | Subscription | Yes (AI, SVG, PDF) |
| Affinity Designer | Mid-level, one-off purchase | One-time fee | Yes |
| Procreate | Illustration, iPad users | One-time fee | Yes (with export) |
| Freelance designer | Full custom work | Varies | Yes |
If you are comfortable with technology but new to design, Canva is genuinely excellent for starting out. It has templates sized for common merch items and exports files that most print shops accept. For more complex or scalable artwork, Adobe Illustrator produces vector files that resize without losing quality, which matters enormously when printing on different products.
Not sure whether to design yourself or hire someone? Ask these questions:
- Do you have more than ten hours to learn a new tool?
- Is your concept highly detailed or illustrated?
- Does your budget allow for a freelancer (typically £50 to £300 for a single design)?
If the answer to any of these is no, start with a template-based tool and keep your design simple. You can always upgrade later. Exploring trade business merch strategies and workwear merchandising examples can also spark ideas about how professionals approach visual consistency across product ranges.
Pro Tip: Most paid design tools offer free trials. Use them to test whether a platform suits your workflow before spending any money. Canva’s free tier is surprisingly capable for a first merch run.
Design principles for effective merch
Choosing your tools is only half the battle. Knowing how to use them well is what separates merch that sells from merch that gathers dust. Merchandise with clear, unique concepts connects best with fans and buyers, and that clarity starts with a few core principles.
“Good merch design is not about fitting everything in. It is about leaving out everything that does not need to be there.”
Here are the five principles every creator should apply:
- Keep it simple. A design that reads clearly at a glance works better than one that requires close inspection. If your artwork looks cluttered on screen, it will look worse on fabric.
- Balance text and imagery. Too much text overwhelms. Too little leaves the design feeling empty. Aim for one focal point, whether that is a graphic, a phrase, or a logo.
- Choose colours with purpose. High contrast improves visibility. Dark ink on light fabric and light ink on dark fabric both work well. Avoid more than three colours in a single design to keep production costs manageable.
- Test across product types. A design that looks great on a T-shirt may not translate to a tote bag or mug. Check your artwork at different sizes and on different backgrounds before finalising.
- Gather feedback before committing. Share mock-ups with five to ten people from your target audience. Ask what they think the design means, not whether they like it. Their interpretation tells you more than their approval.
Looking at restaurant merchandise ideas and indie artist merch design examples can show you how different creators apply these principles across varied product types. Iteration is normal. Expect to refine your design two or three times before it feels right.
From design to production: testing and launching your merch
A brilliant design is only the beginning. Getting it printed, tested, and in front of buyers requires a structured approach. Rushing this stage is where most creators lose money.
Follow these steps in order:
- Create a digital mock-up. Use free mock-up generators to visualise your design on actual products. This helps you spot sizing or placement issues before spending anything.
- Order a sample or small batch. Most reputable printers offer sample orders. Order one or two items to check print quality, colour accuracy, and fabric feel.
- Gather feedback on the sample. Show it to people who represent your target audience. Ask about quality, wearability, and whether the design reads as intended.
- Make final adjustments. Tweak colours, sizing, or placement based on real feedback, not assumptions.
- Move to full production. Once you are satisfied with the sample, place your full order with confidence.
Careful production and feedback loops prevent costly mistakes that are difficult to reverse once a full run is printed. Track these numbers from the start:
| Metric | Why it matters |
|---|---|
| Cost per item | Determines your minimum selling price |
| Selling price | Should be 2.5 to 3 times the cost per item |
| Profit margin | Aim for at least 50% after all costs |
| Units ordered | Keep first runs small to reduce risk |
Common mistakes to avoid include over-ordering on an untested design, ignoring shipping costs when pricing, and skipping the sample stage to save money. That saving almost always costs more in the long run. A well-planned launch, supported by a full merchandise production guide, gives your merch the best possible start.
What most first-time merch creators overlook
Here is something the standard advice rarely says: the most successful merch is not always the most visually impressive. It is the most meaningful. Fans do not buy a T-shirt because the typography is excellent. They buy it because wearing it says something about who they are.
The creators who build lasting merch income involve their audience in the process. They post a poll between two design options. They ask fans to submit a word or phrase that defines the community. They name a product after an inside joke from a live show. These small acts of co-creation turn buyers into advocates.
Generic merch fails because it treats the product as an afterthought. Meaningful merch treats the customer’s experience as the whole point. If you want to explore this further, personal brand merch ideas can show you how other creators have built loyal communities through intentional product design. Your aesthetic matters, but your audience’s sense of belonging matters more.
Bring your merch vision to life with The Inner Sanctum Group
You now have the framework to design merch that connects, converts, and represents your brand with confidence. The next step is finding a production partner who handles the heavy lifting so you can stay focused on your creative work.
The Inner Sanctum Group makes it straightforward to go from design to finished product without upfront stock costs. Whether you are starting with a customisable T-shirt for your first drop or stepping up to an oversized custom shirt for a premium feel, the platform handles printing, packing, and shipping on your behalf. Fans order, you earn commission, and your merch reaches them without you managing stock. Launch your merch with a team that understands what independent creators actually need.
Frequently asked questions
What is the best software for designing merch if I’m a beginner?
Easy-to-use platforms like Canva are ideal starting points, as digital tools deliver professional-quality results without requiring prior design experience. Most offer free tiers that are more than sufficient for a first merch run.
How many designs should I create before launching my first merch line?
Start with one to three designs and gather feedback before expanding. Testing with audiences early prevents you from investing heavily in designs that do not resonate with buyers.
What design mistakes cause merch not to sell?
Overcomplicated artwork, poor colour choices, and ignoring audience preferences are the most common culprits. Clear, unique concepts consistently outperform busy or generic designs when it comes to actual sales.
Do I need professional printing for my first run?
Not necessarily. Small-batch production and print-on-demand services are cost-effective starting points that still deliver solid quality for independent creators testing the market.
How can I protect my merch designs from being copied?
Add a copyright notice to your design files and consider registering your artwork with the UK Intellectual Property Office for stronger legal protection. Keeping high-resolution originals with timestamps also helps establish ownership if a dispute arises.
Recommended
- Master the design process for indie artist merch in 2026 – The Inner Sanctum Group
- Merchandising for independent musicians: create and sell fan favourite – The Inner Sanctum Group
- The merch process explained for independent creators 2026 – The Inner Sanctum Group
- How merch supports independent artists’ brand and revenue – The Inner Sanctum Group